New Slim iPod Battery Installation Guide
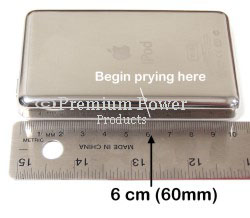
Measure down the right or left seam of the iPod 6 cm (60mm)...this is the point to begin prying the case. At this point, insert the included screwdriver and begin to pry open the case, working back and forth along the seam.
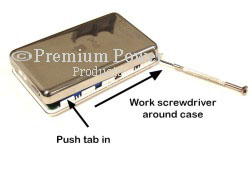
Once the side you are working on pops loose, work your way around the iPod, unclipping the clips from the silver case by pushing the towards the center of the iPod. Once the silver case comes loose, it should still be attached by a ribbon cable.
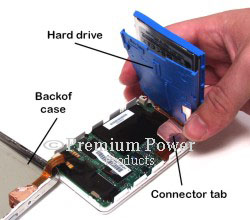
Once you have access to the inside of the iPod you will notice the hard drive surrounded by blue rubber. Remove the hard drive by lifting all the blue rubber. At the base of the rubber you will see a small ribbon cable tab that connects the hard drive to the motherboard. Gently lift this tab and disconnect the hard drive. Place the hard drive aside for re-assembly.
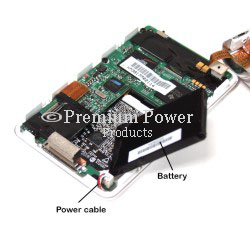
To remove the battery, lift the battery from its compartment using the included screwdriver. You will notice the power cable is wrapped under a portion of the green motherboard. Carefully pull the power cord out from under the motherboard, you can use the screwdriver to assist you.
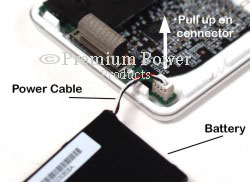
Using your fingers, gently disconnect the battery by gently pulling on the power connector. The battery should now be free from the unit and the replacement battery can be plugged in.
Remember to wrap the power cord back under the motherboard before applying the battery within the case (use the screwdriver to push it back in). Reconnect the hard drive by placing the hard drive connector over the socket in the motherboard and push it in. Verify the connection by gently pulling on the hard drive. Place the hard drive back into position and snap the silver metal case back together. Your new battery is now ready for charging.
Your new battery will need a minimum of three hours of charging before first use.